Set Up ARM Virtual Raspberry Pi

Linux Penguin

Arm Virtual Hardware (AVH) users can use Remote.It to remotely access their Arm virtual devices without complex VPNs or network configuration changes. Users can combine AVH devices into the same network as local and devices in other public clouds such as AWS. Remote.It enables users with APIs and scripts to programmatically manage your AVH network.

AVH delivers ready-to-use models of Arm-based processors, systems and third party hardware. Arm Virtual Hardware runs as an application in the cloud to simplify, automate, accelerate and cost-reduce maintenance and development processes. This enables fast prototyping, build and deployment with efficient selection of the best Arm-based silicon for a new or updated application. This guide will step you setting up a virtual Raspberry Pi.

You will need:

Set Up an AVH virtual Raspberry Pi:

  1. Login to your Arm AVH account: https://avh.arm.com
  2. Click on "Create Device"
  3. Select Raspberry Pi 4 and then you can choose from one of the provided firmware packages.
  4. Finish the steps to create the device. Once the device is finished being created you are now ready to install Remote.It
Install Remote.It:

1. On your Raspberry Pi Device Page, click on Install in the Remote.It section. (see image below)
ARM AVH virtual device can install Remote.It via the Arm portal with one click

2. Once complete, copy the generated claim code. (See image below)

Arm AVH virtual device installation creates a claim code to add device to your existing Remote.It account

3. Open app.remote.it or the Remote.It desktop app and use your claim code. Click on the + and enter the claim code. (see image below)

Enter claim code on Remote.It web or desktop app to add the new Arm AVH virtual device to your Remote.It account

4. Set up services
The Remote.It web portal or desktop app will notify you that your Virtual Raspberry Pi has been registered.

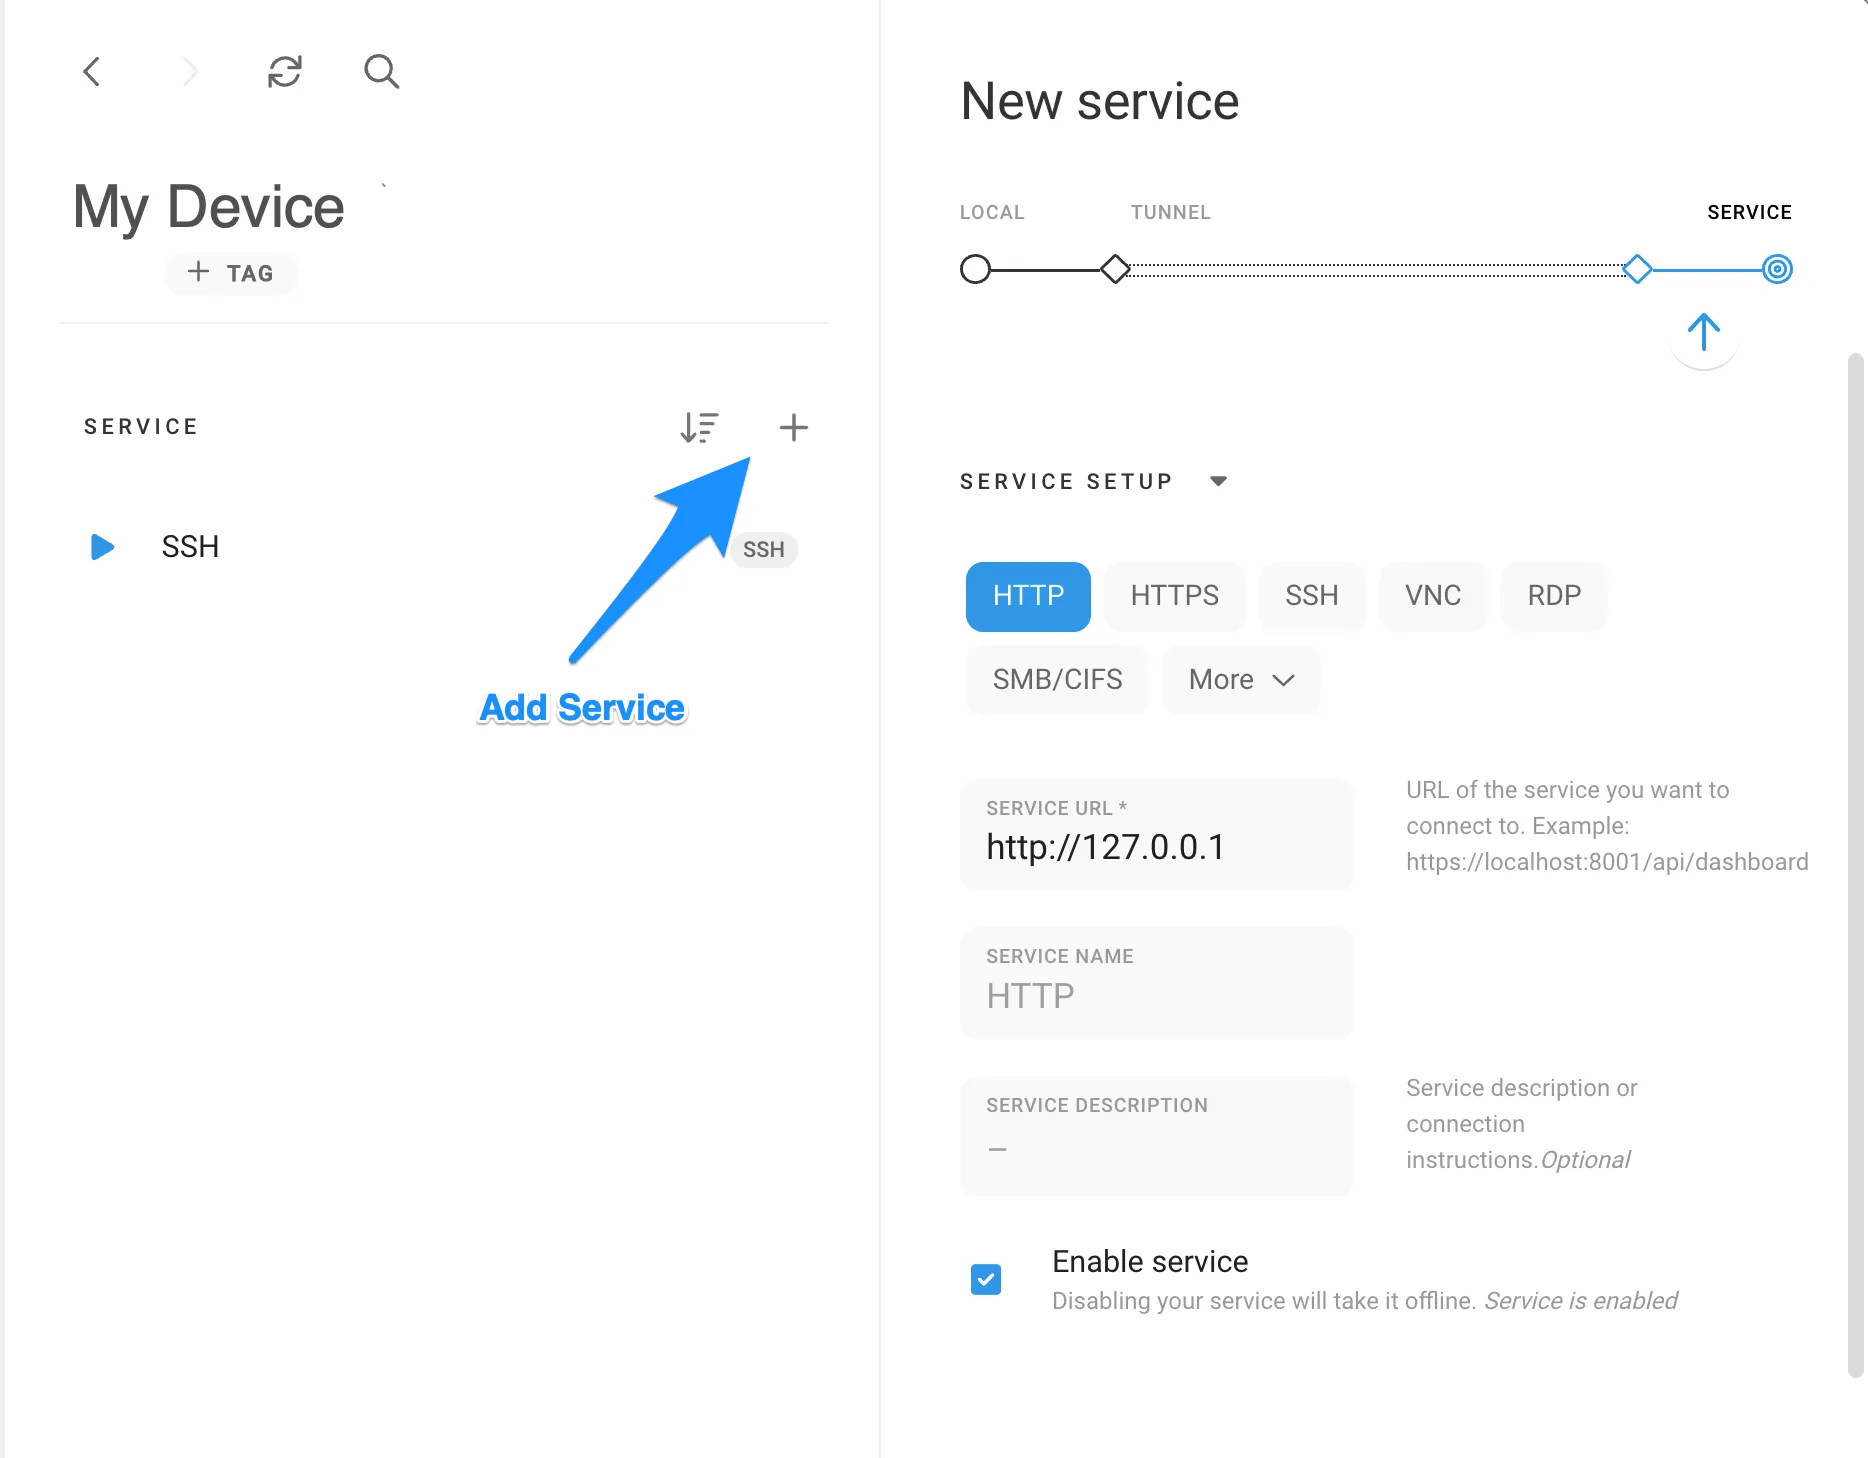
To add services for Remote.It access, click "+" (Add Service) on the device detail. You can start with adding SSH.
Make sure that the service is running on your Virtual Raspberry Pi. Provide a name, port, and service host address (Defaults are provided for most services). Only override default ports if you have assigned a different port for this service on this Virtual Raspberry Pi. For example, if you setup a web server, you can create a service that will allow you to connect to it and view it in a browser.

Repeat for all the services you would like to access remotely.

Linux Add Service


5. Connect
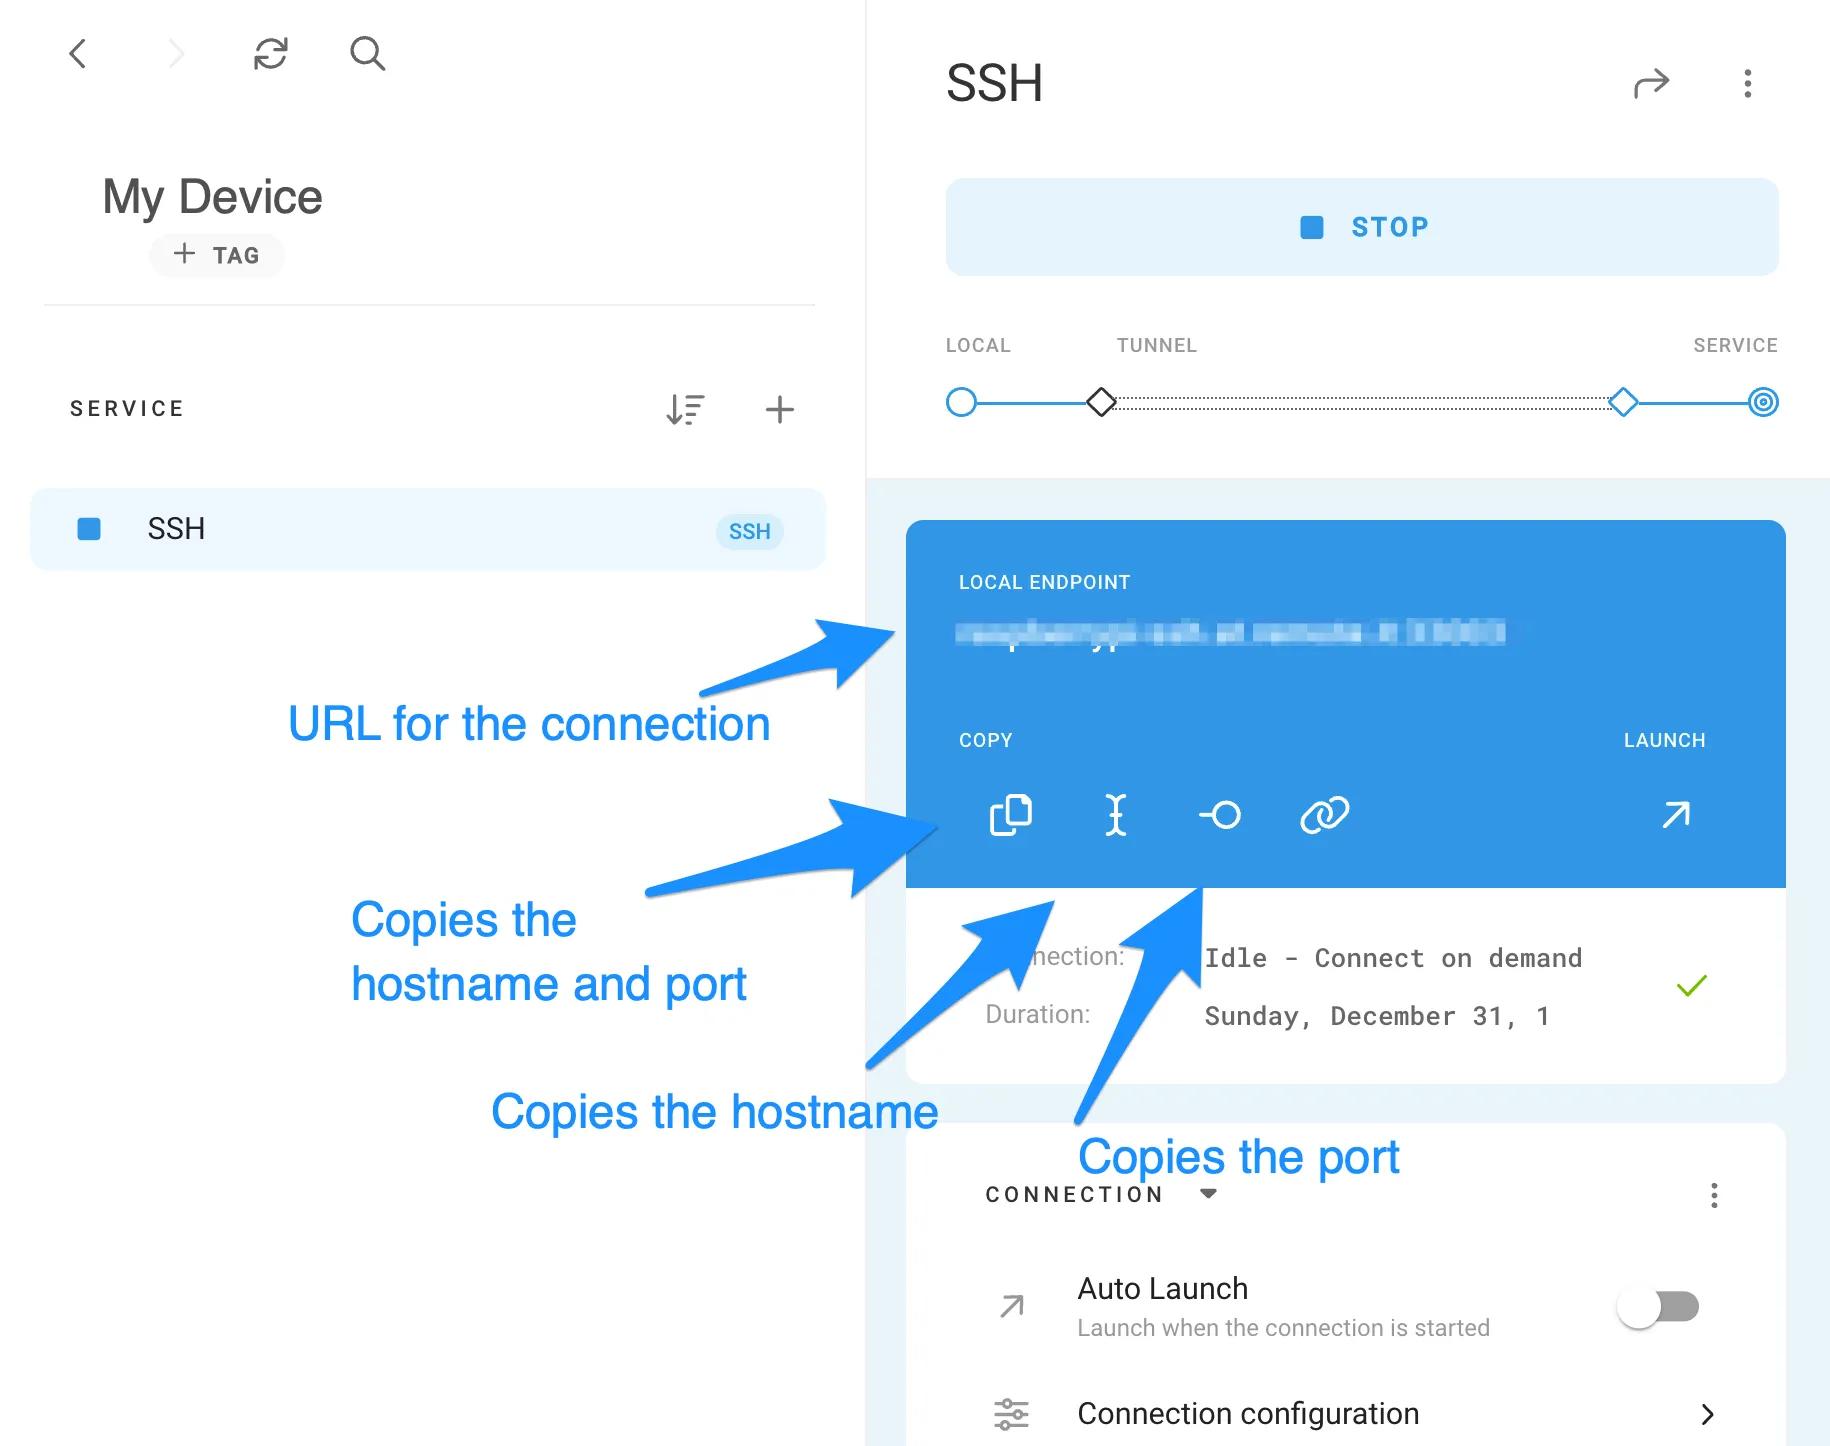
Select the service you would like to create a Remote.It connection to and click "Connect". You can now use this connection address in the application such as terminal, VNC viewer or a browser (see image below). When you are done with the connection, click "Stop Connection".
Linux make connections using URL, copy hostname and port

Ready to do more?

Remote.It has a lot more to offer from allowing you to share your devices to friends and colleagues, advanced connection configurations, online/offline notifications, manufacturing support and more. Learn about them here.