Skip to Instructions
Connect to your home or office network securely from anywhere through our secure encrypted connections, accessing files and the web as if you were at home.
Connect to your home network securely from anywhere through our secure encrypted connections, accessing files and the web as if you were at home. Bypass geo-restrictions and use media and services securely while away. Available for no additional charge during Beta. Plans coming soon.
While using a SOCKS connection, your whole computer can also act as if you were on the home network, so applications will also act as if you were home as well. See the connection instructions. You can make a connection with mobile devices, but we do not support set up at this time.
Requirements to set up your Socks Proxy:
- A device with Remote.It installed at the desired location that will always be on and never enter sleep mode, acting as the host. Suitable devices include a Raspberry Pi Zero W or an OpenWRT travel router.
- A Remote.It Account (sign up here https://app.remote.it)
- A computer or phone that you will use to set up the device
- A computer with the Remote.It Desktop application or using https://app.remote.it. The desktop application is recommended.
- Set up your host device at the desired location. Raspberry Pi instructions, all other devices can be found here.
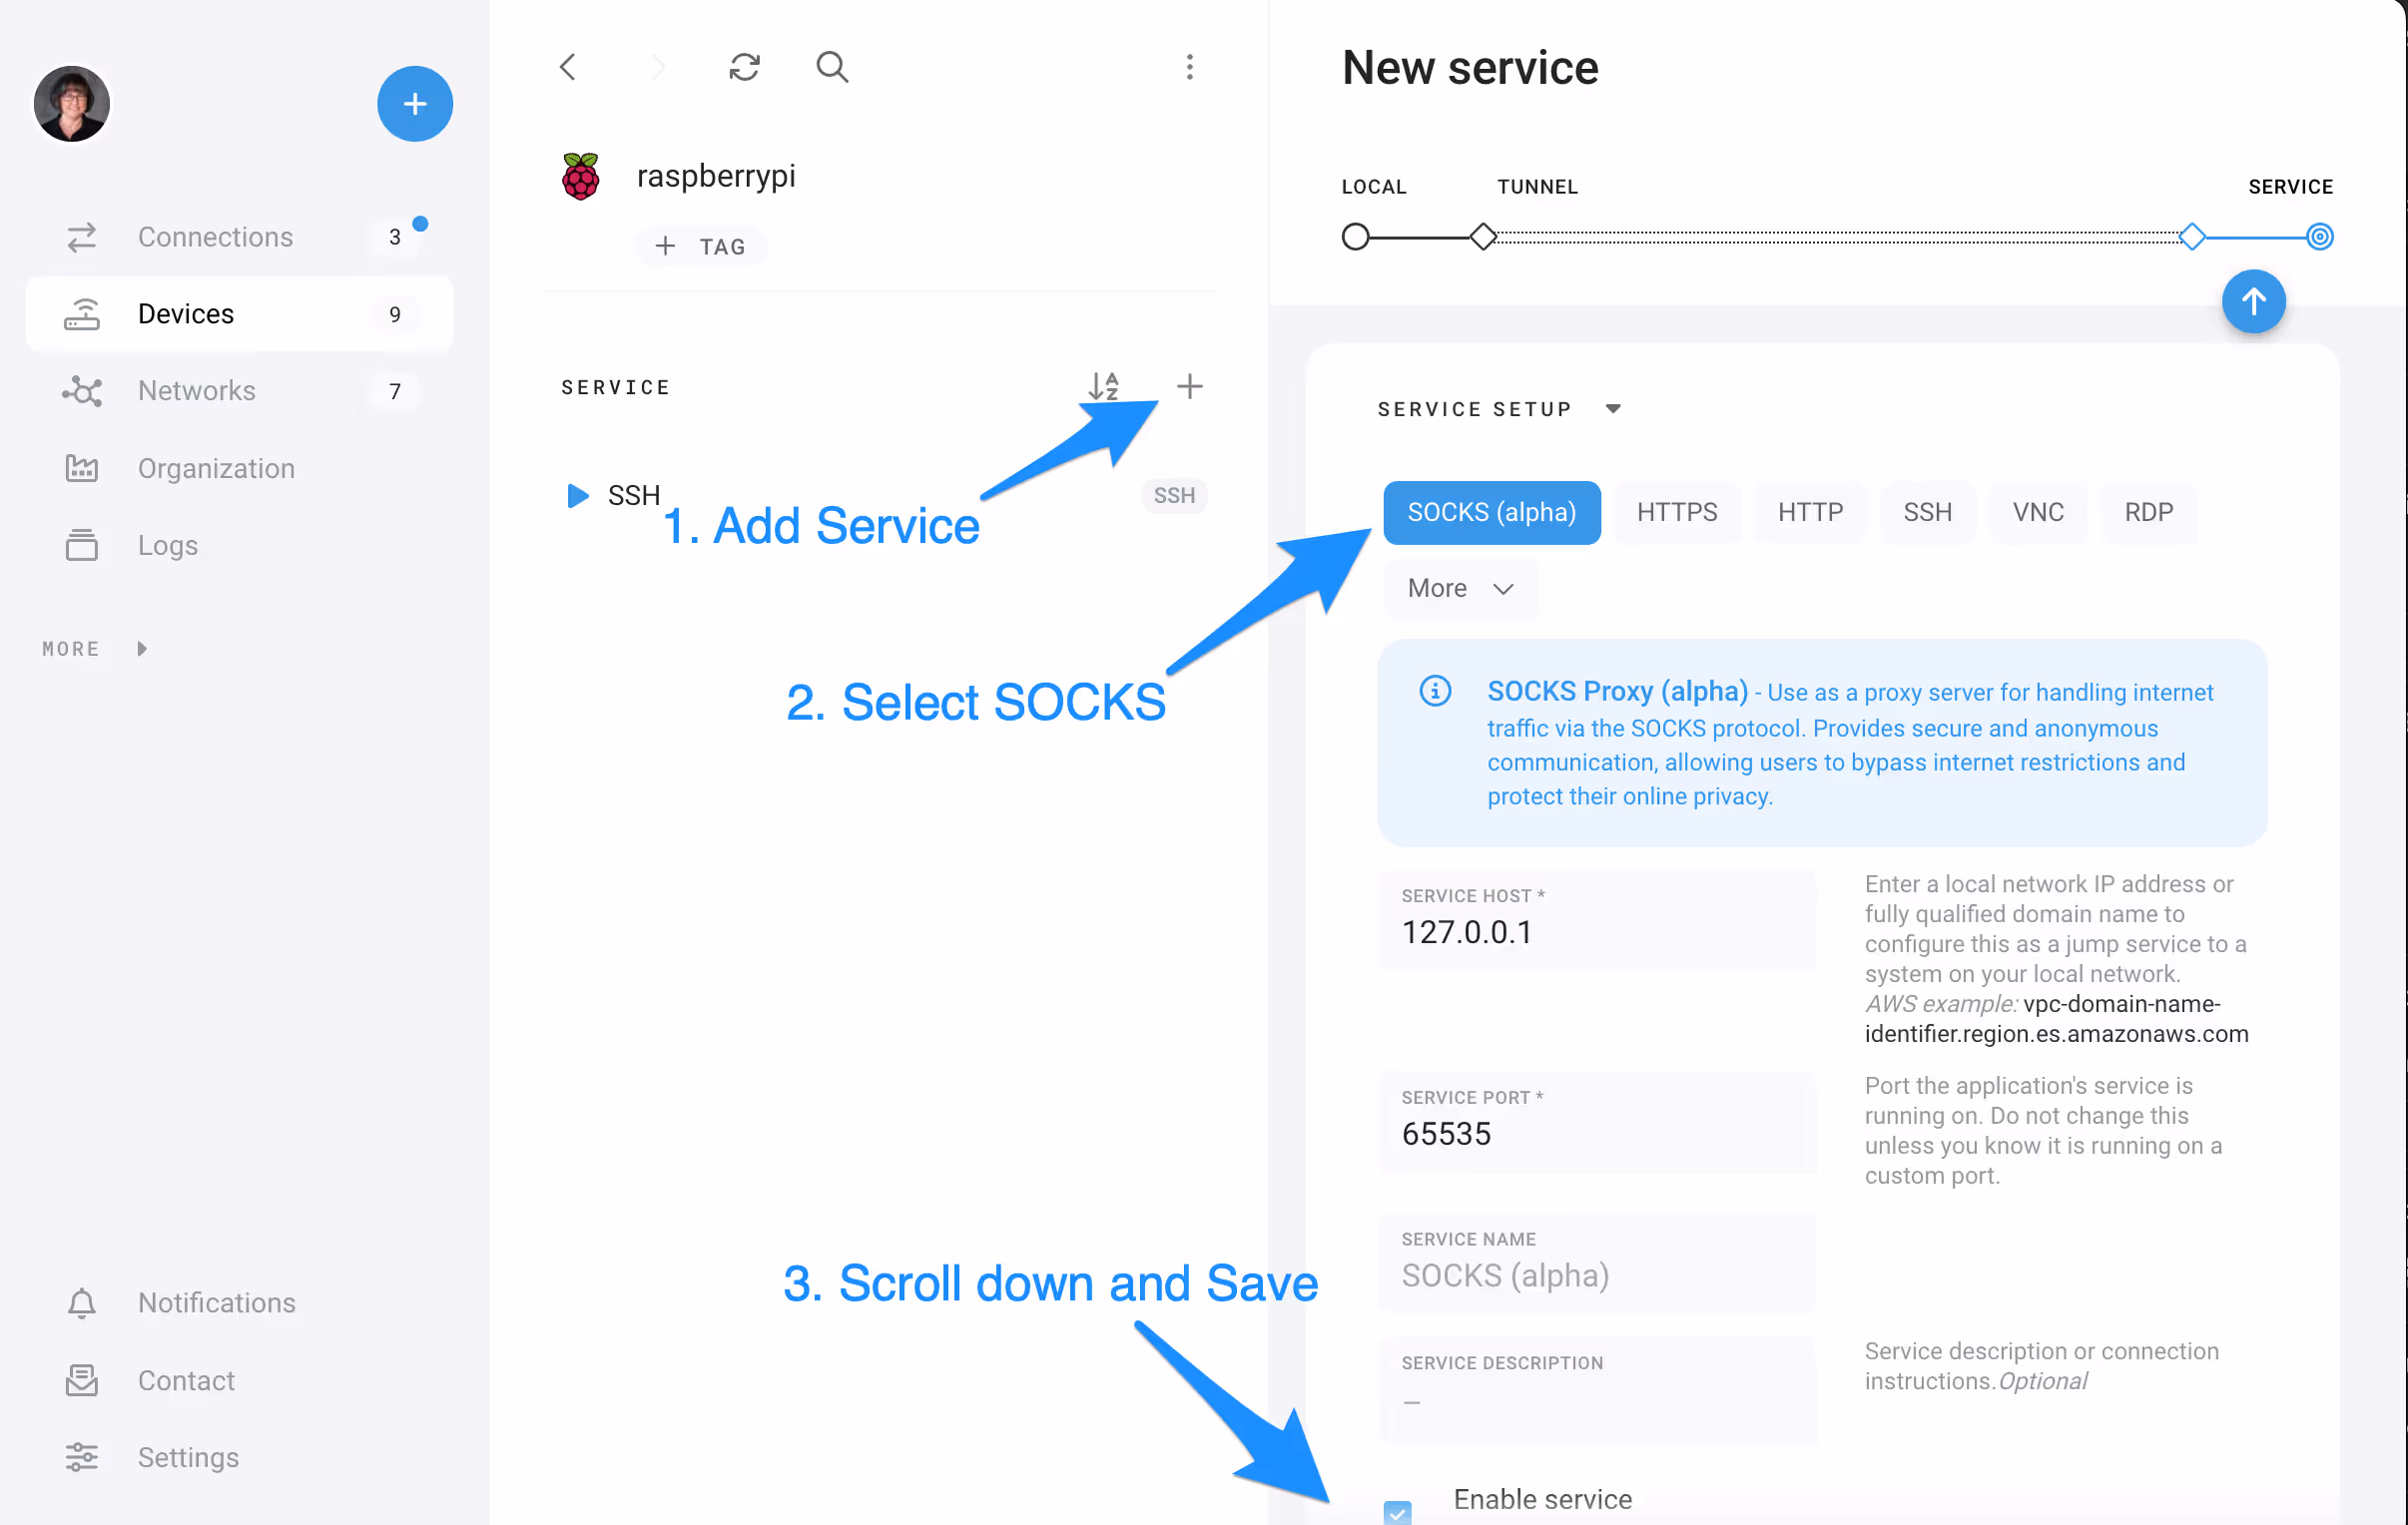
- In the Remote.It Desktop App, Mobile app, or https://app.remote.it add another service to the device of SOCKs. Leave the port as defined and Save (See Image Below)
- Once the service is online, then you can connect to it from anywhere in the world.
Connecting
Using the Remote.It Desktop App (Recommended)
- While away from the home network which you want your computer to act as if you were still there, open the Desktop Application on your computer.
- From the device list, click on the computer that you set up at home, and then the SOCKS service, then Connect. (You may need to set the application to launch when the connection starts.) To do so, click on Connection Configuration, then in Application path select the browser application you want to use, such as Google Chrome or Microsoft Edge.
- Any browser tabs and windows you have open will re-open using the proxy location of the home/offlce device that you set up and any new browser windows will also be using the proxy location.
- If you only need to use the Proxy in your browser, you are done. If you need to use the Proxy connection information for other applications at the system level, proceed to the Instructions for System Usage.
Using the Remote.It Web Portal
- While away from the home network which you want your computer to act as if you were still there, open https://app.remote.it
- From the device list, click on the computer that you set up at home, and then the SOCKS service, then Connect.
- Proceed to Instructions for System usage. NOTE: These connections are active for a max of 8 hours or 15 minutes of inactivity (whichever is first). After which, you will need to turn off the SOCKs proxy make a new connection and then reconfigure with the new url.
Instructions for System Usage
Remote.It web portal connections are active for a max of 8 hours or 15 minutes of inactivity, whichever occurs first. After it expires, you will need to turn off the SOCKS proxy in your network interface, make a new connection, then follow these steps again. For best results, use the Remote.It Desktop Application.
Use the SOCKs proxy on your Windows Computer
- Go to “Settings” > “Network & internet” > “Proxy.”
- Under “Manual proxy setup,” toggle the “On” button. Use the connection url and port for the proxy server connection provided by the Remote.It connection and then click “Save.”
Use the SOCKs proxy on your Mac
- Go to “Settings” and search "Proxies"
- Select "Proxies", this should open your active network interface to the "Proxies" section
- Toggle "On" SOCKS proxy.
- Using the Remote.It connection information enter the url in the server section and the port in the port field and click "OK"
- When switching to a new WiFi network, you will need to repeat these steps.
Ready to do more?
- Share access to your SOCKS proxy or to some of the other services
- Add other applications to your Pi and access them remotely like a web server or VNC
- Create a public link to your web page
- Add Jump Services to reach IP cameras or other devices on your LAN
Are you a developer?
Explore our developer docs website for our open source WiFi onboarding package, image production, graphQL API and more.