
We believe in securely connecting everything by enabling users to build private networks within the internet that only they can see. We provide zero trust IT/OT networking as a service.
Language
English

A Synology NAS (Network Attached Storage) provides a networked location to store data such as images, movies or other types of files. These instructions are intended as a guide for remote access to your Synology NAS. As a general rule, if your Synology NAS is hosting a service which is accessible via a LAN address and port, then Remote.It can be used for access from outside the LAN without port forwarding on a public IP address.
You will need:
The following instructions are using DSM 7.1 version of the Synology web interface and client application. The screens be updated by Synology, if so please refer to their user documentation.
In this section we will be configuring your Synology NAS to accept remote connections to support SMB for file sharing/transfers. If you already have this setup, you can skip to "Install and configure Remote.It"
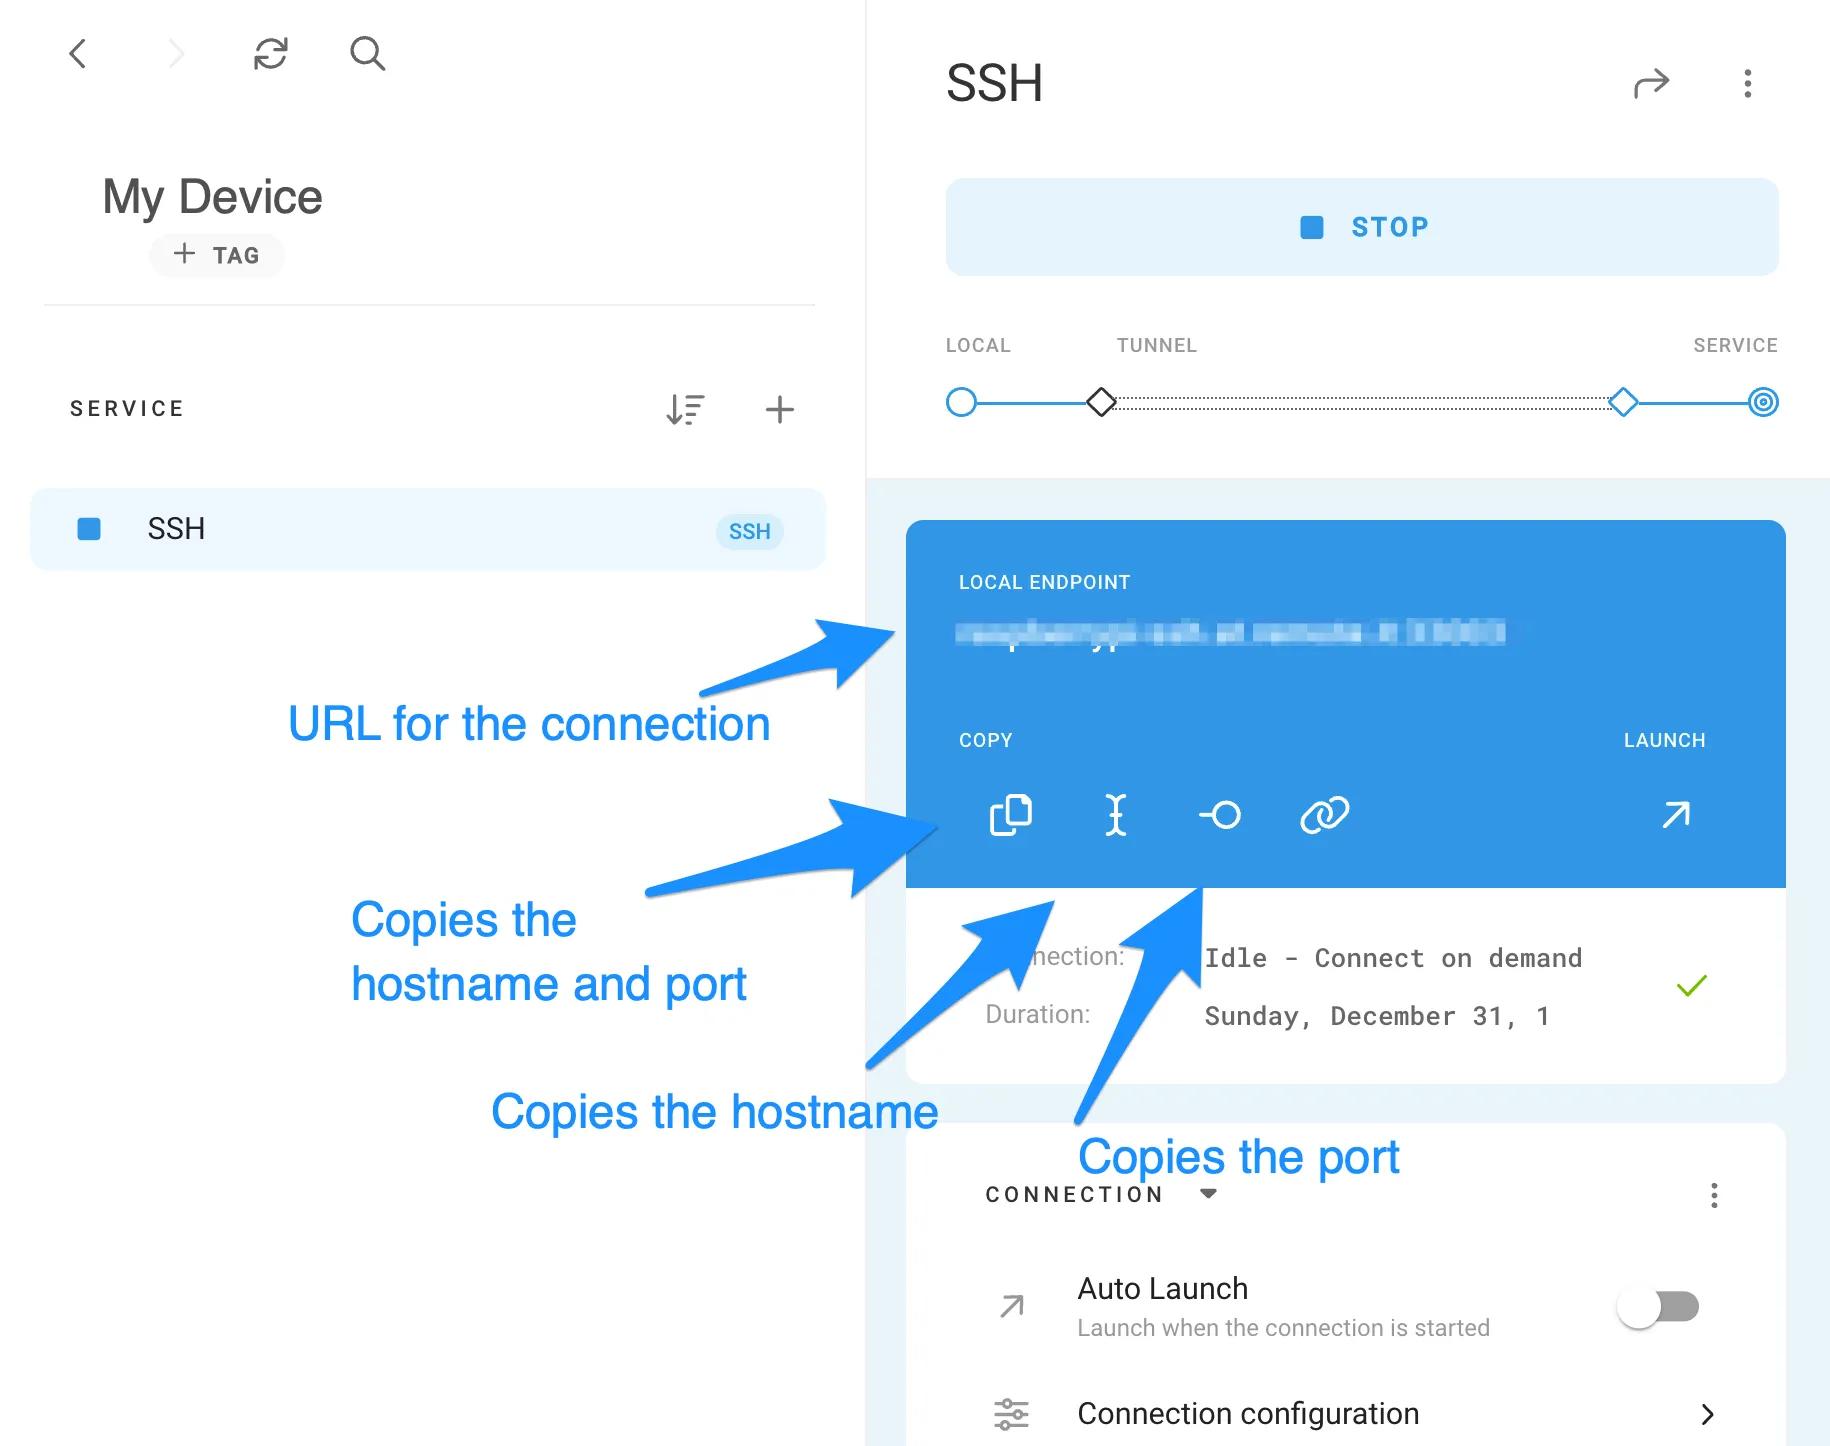
In this section we will be configuring your Synology NAS to accept remote connections to support SSH/terminal console access. If you already have this setup, you can skip to "Install and configure Remote.It"
1. Download the below package
2. Access the Synology NAS using the web interface or Synology client application. Open the Package Center and click on the "Manual Install" button


The Synology "Installed Packages" screen in the Package Manager should now show Remote.it. You are now finished using the Synology interface and you can close it.

The Remote.It web portal https://app.remote.it should also display your Synology NAS. (You may need to refresh the device list page)
If you would like to add access to the Synology Web UI, click "+" (Add Service)
Select "HTTPS". You may supply a name such as "Synology Web UI". Enter "5001" for the "Service Port". Click "Save".
If you would like to add access to SSH, click "+" (Add Service)
Select "SSH". You may supply a name such as "SSH". Enter the SSH port configured in the Synology Web UI in the "Service Port" field. Click "Save".

If you see that the service is offline, you will need to restart the device once to enable the added services. (This is a known issue in older versions of the software. You can restart the device in the Web UI under the "Maintenance" menu selection.
Remote.It has a lot more to offer from allowing you to share your devices to friends and colleagues, advanced connection configurations, online/offline notifications, manufacturing support and more. Learn about them here.