Getting Started: Secure Webcam with Raspberry Pi
The purpose of this guide is for the novice and advanced Raspberry Pi user to set up a camera with useful software for the first time. Then hosting your own secure webcam with remote.it that can be accessed from desktops, mobile devices and the web over ANYinternet connection. This is all done for free without needing to buy domains, forward ports in your router or setup a vpn. Your webcam will only be available to you and those who you explicitly share it with.
If you have already installed an operating system and connected to the internet with your pi you can jump to “Boot Pi and Enable Camera“:
A user of this guide should be comfortable with using the terminal and ssh.
Needed Materials:
Raspberry Pi
Raspberry Pi Camera
MicroSD Card + Reader
Raspberry Pi Power Supply
Raspberry Pi case + camera case (optional)
Terminal Software (putty for windows, terminal for Mac/Linux)
This project is a great way to get started with a RasperberryPi and a dedicated camera. With the added benefit of securing your camera and Pi against hackers while making it accessible to you (and who you decide to share it with) over the internet.
It’s the dream– a cheap, private and quick webcam over the internet!
Step 1: Installing the Camera to your Raspberry Pi
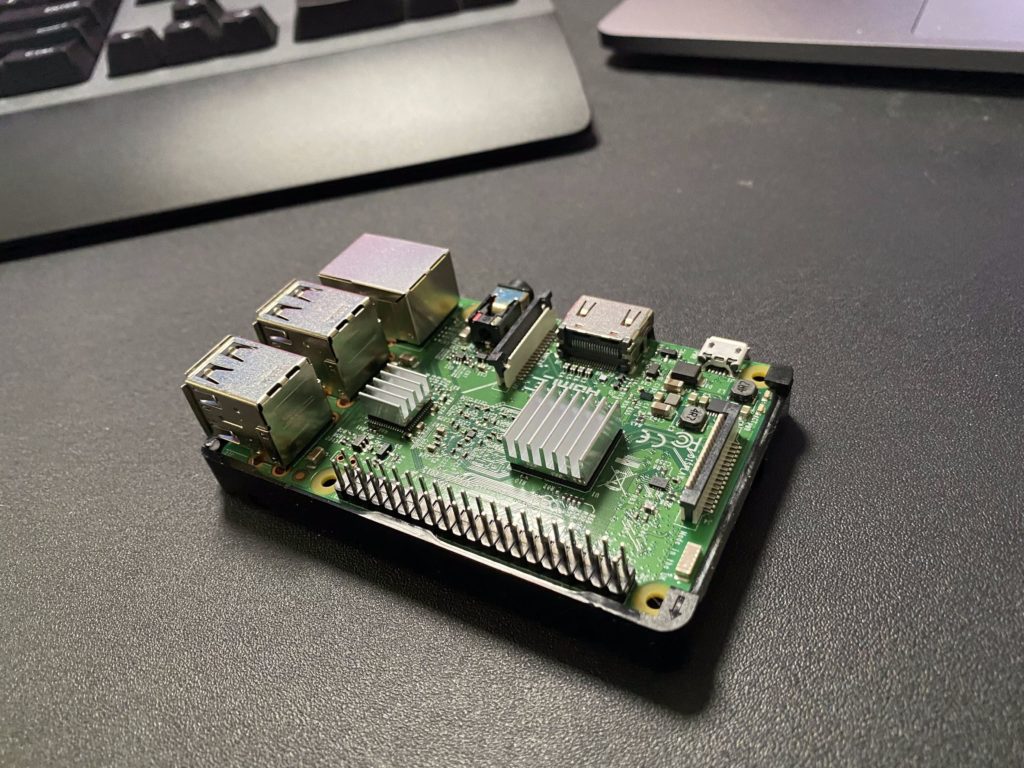
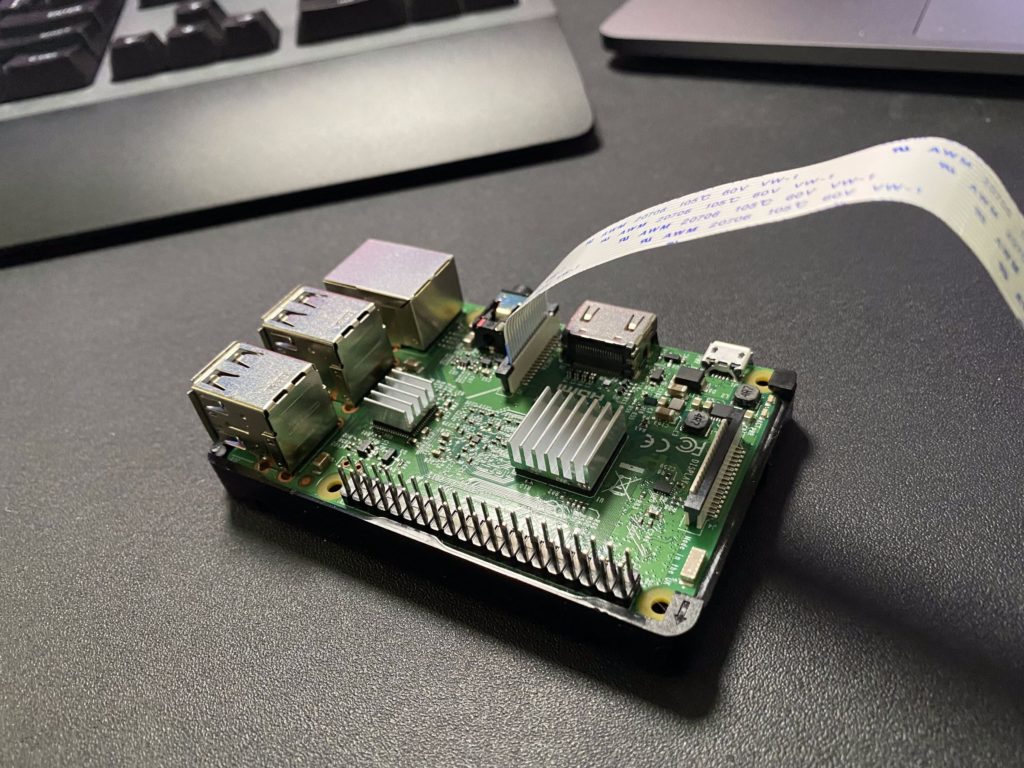
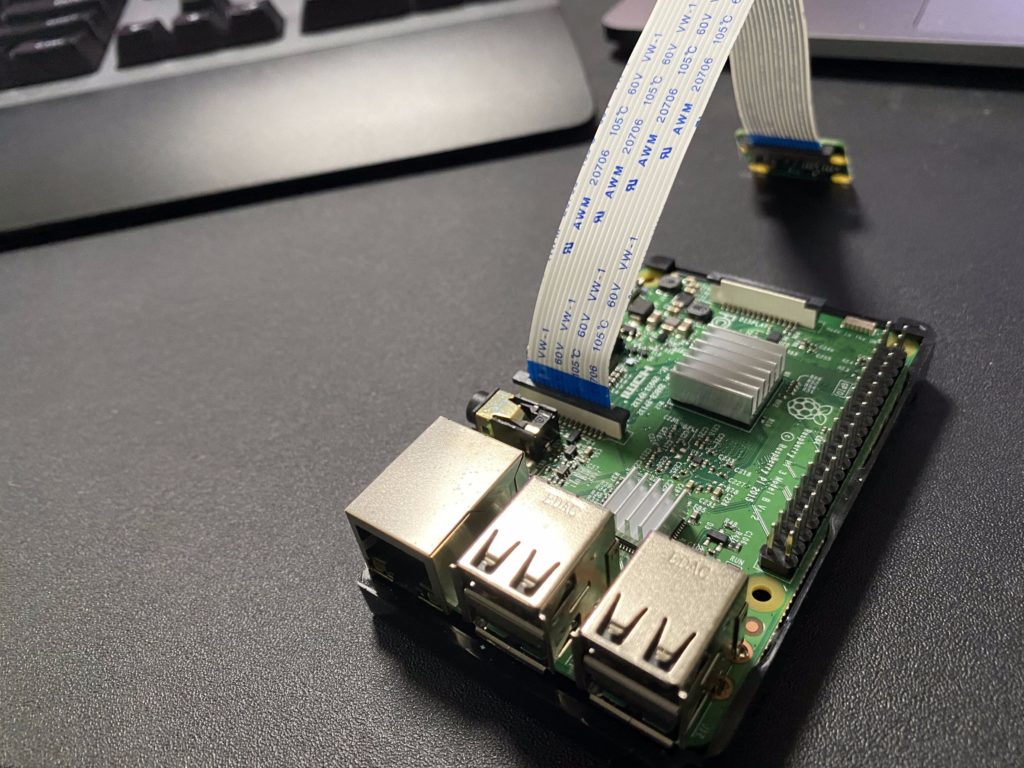
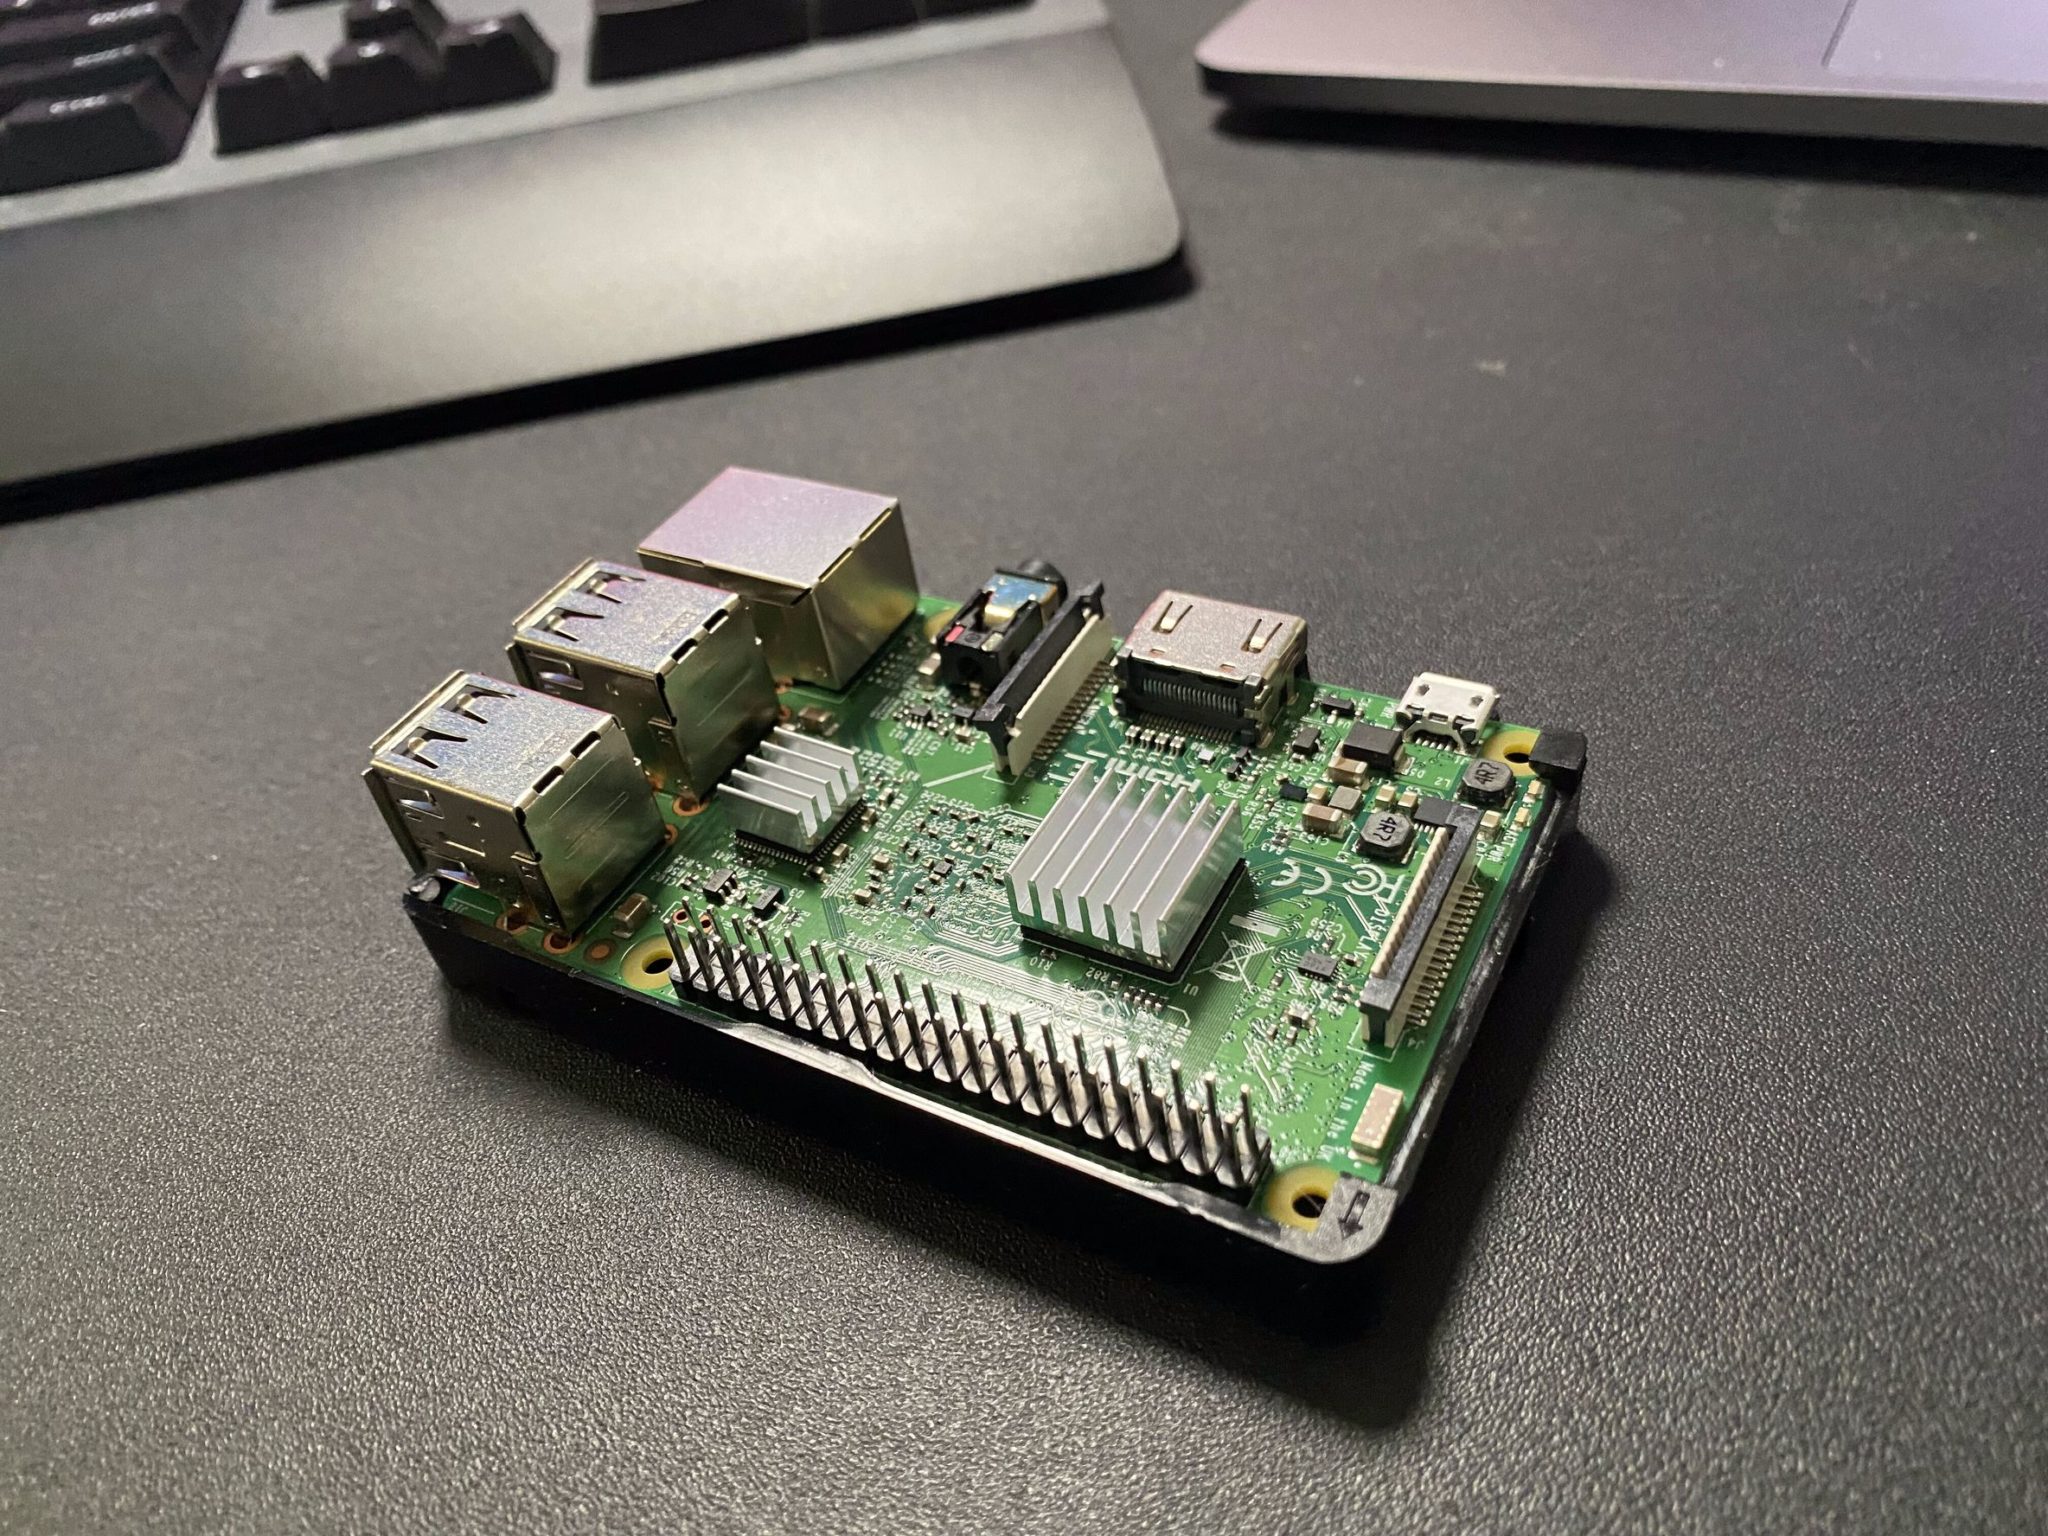
Lift up on both sides of the black tab – it will not come off completely.
Insert the ribbon cable and push down on the black tab to secure
Make sure the ribbon is facing the correct direction based on the images above.
Create Remote.It Account
Sign up for free to get started! Connect to any of your devices in a simple secure way from and to any network.
Download desktop and mobile apps


Step 2: Prepare OS for the Pi
Write image to SD Card
Download and install Raspberry Pi imager
Select the desired OS – the current selections differ on whether or not they contain a graphical desktop. We’re going with the standard 32bit OS with GUI
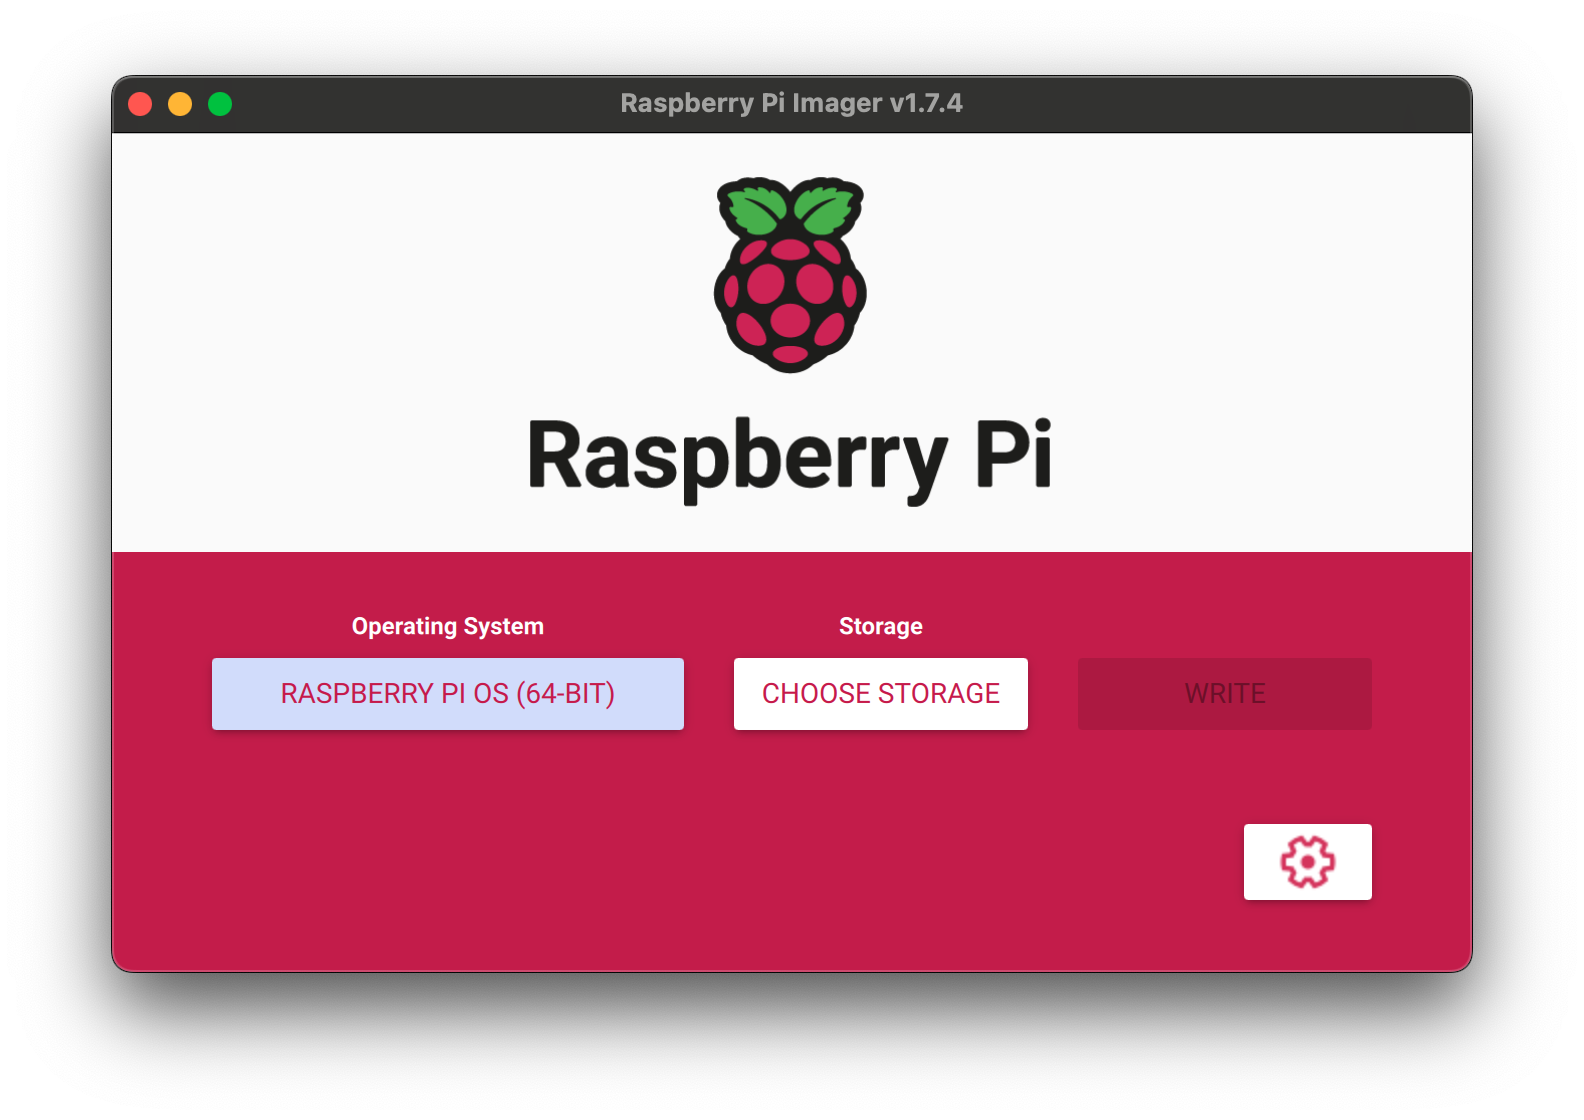
Click the Settings (Gear Icon) to set up Hostname, SSH, WiFi and other locale settings. For more information, please refer to Raspberry Pi Documentation.
Step 3: Boot Pi and Enable Camera
Install your SD card and connect the power cable to boot your Raspberry Pi.
local connection to Pi
You have multiple options to connect –
Option 1: You can plug in a HDMI cable from your pi to a monitor and connect a keyboard/mouse. This route will allow you to view the desktop. Open the terminal to complete these rest of this guide.
Option 2: You can SSH to the pi from your computer.This logs you directly into the terminal where you will complete the guide.From the terminal or command prompt confirm it has connected to your local network.
This thread gives additional options https://raspberrypi.stackexchange.com/questions/13936/find-raspberry-pi-address-on-local-network
ping raspberrypi
connect to it with the below and default password raspberry if you haven’t changed it yet
ssh pi@raspberrypi
Step 4: Enable Camera Access
Let’s enter into the configuration to complete the device setup. Exit and reboot when complete.
sudo raspi-config
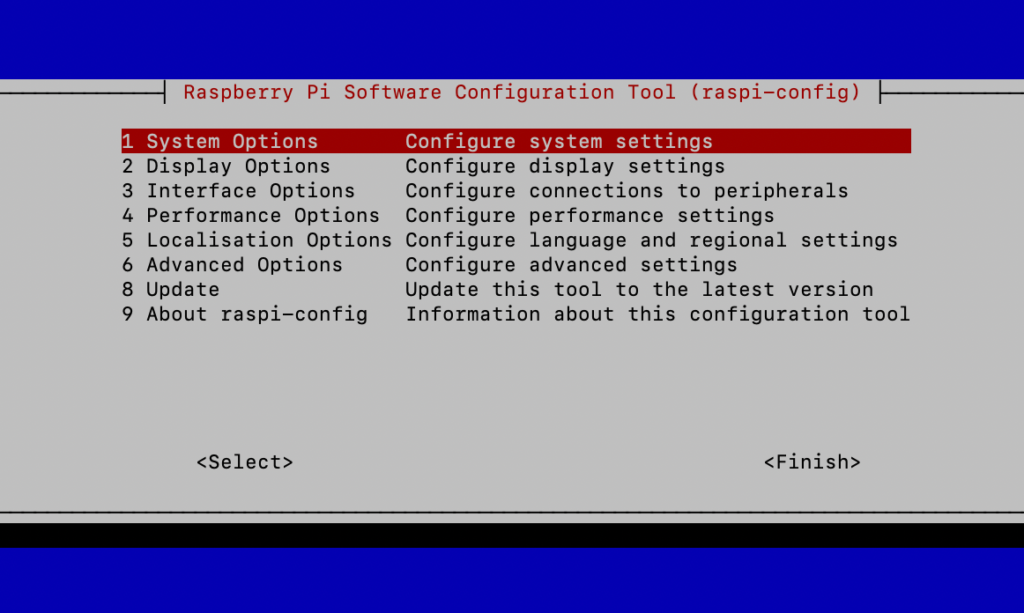
Required Configuration
Enable Camera – Select Option Interfacing Options, then Camera, then Yes
Recommended Configurations
Change Password – Select System Options, then Password, change your password from the default
Change Computer Name – Select System Options, then Hostname, set to a unique name to make your device easier to find
Exit, Reboot your Pi and reconnect in a minute if using the terminal.
ssh pi@NewHostNameif you changed the hostname reconnect with the new name
Step 5: Install Remote.It
Follow instructions for installing Remote.It on a Raspberry Pi
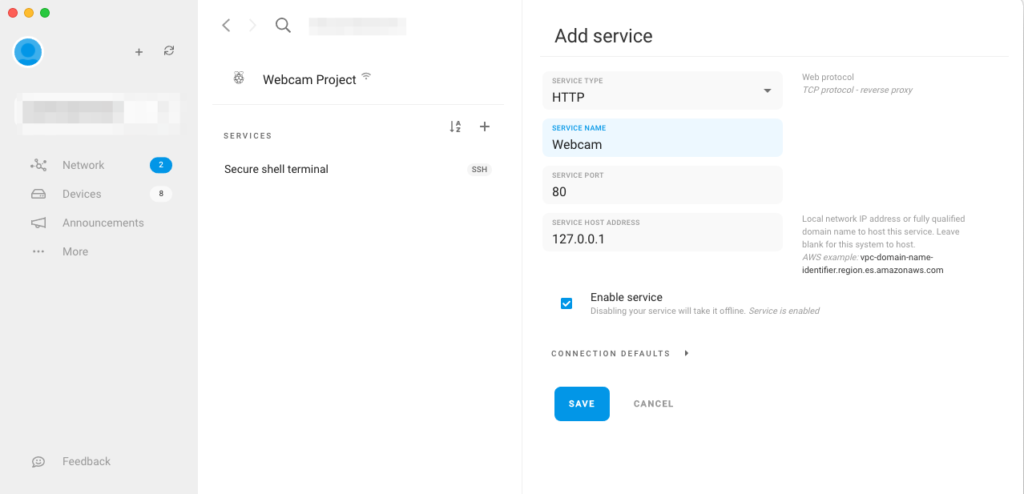
Our example will create two connections but there are thousands of ports that different software can listen on for applications like VNC, RDP, Samba, FTP…
Both these connections are typically only available on your local network but with the remote.it platform its available everywhere to only you.
The first service will be SSH and is automatically created. This allows us to securely login to the terminal of the Raspberry Pi where you or the Raspberry Pi is connected to the internet.
The second service is to allow HTTP for the camera. Our webcam is being served by an apache webserver directly on the Raspberry Pi and it is waiting for connections on port 80.
Step 6: Install webcam software
To view more details on installation and use you can access the below site where this project is maintained. Summarizing here if you’ve followed this guide step by step and want to use the basic installation. All you need to do is hit enter when the installation wizard starts.
git clone https://github.com/silvanmelchior/RPi_Cam_Web_Interface.git cd RPi_Cam_Web_Interface ./install.sh
Step 7: Connect to your webcam via Remote.It from anywhere!
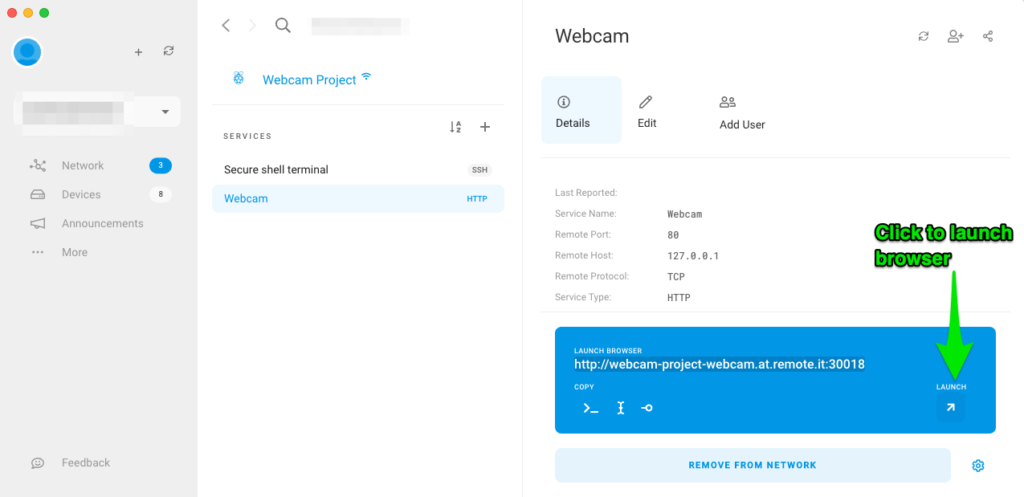
Go to the Remote.It Desktop
Add the HTTP service to your network and click connect. This will automatically open a browser with a secure connection to your webcam!
This URL will be persistent so you can bookmark it and skip adding it before connecting.
I’m using my webcam to check on the status of my bread proofing for the oven!
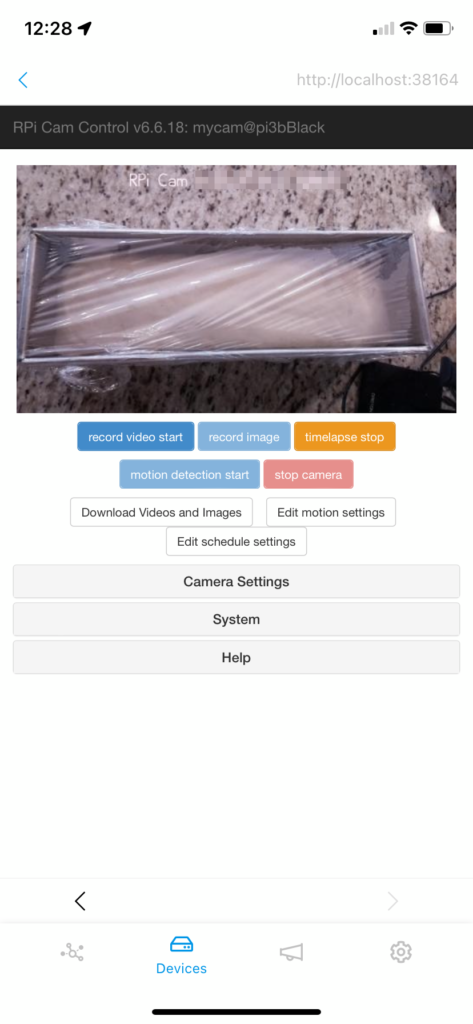
This the view on the webpage – I could use better lighting and positioning.
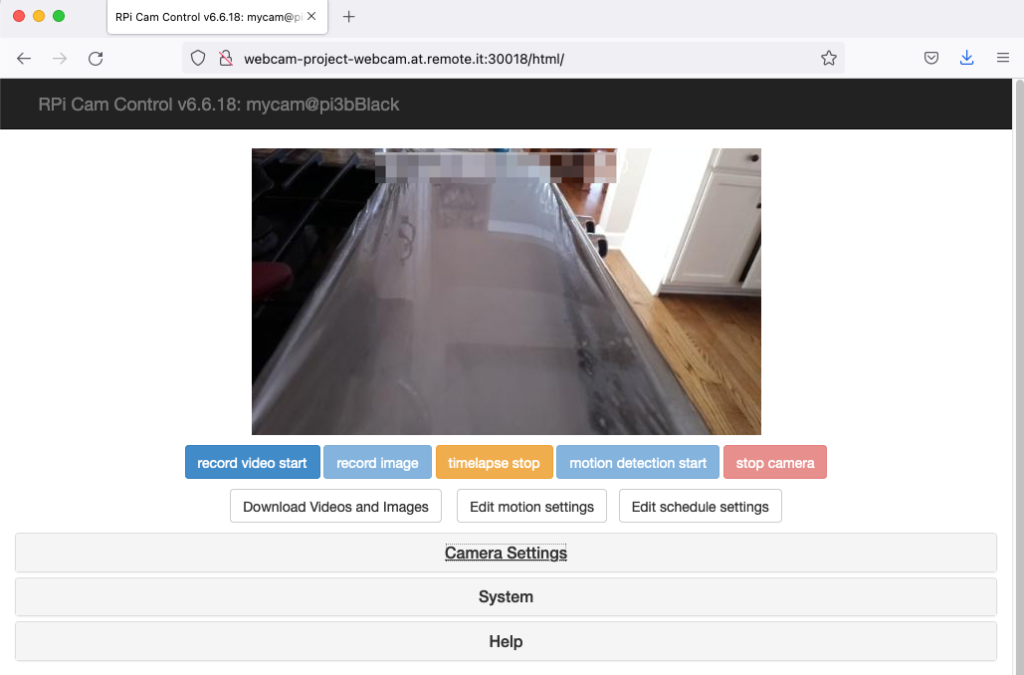
You can record still and videos directly from the webcam view.
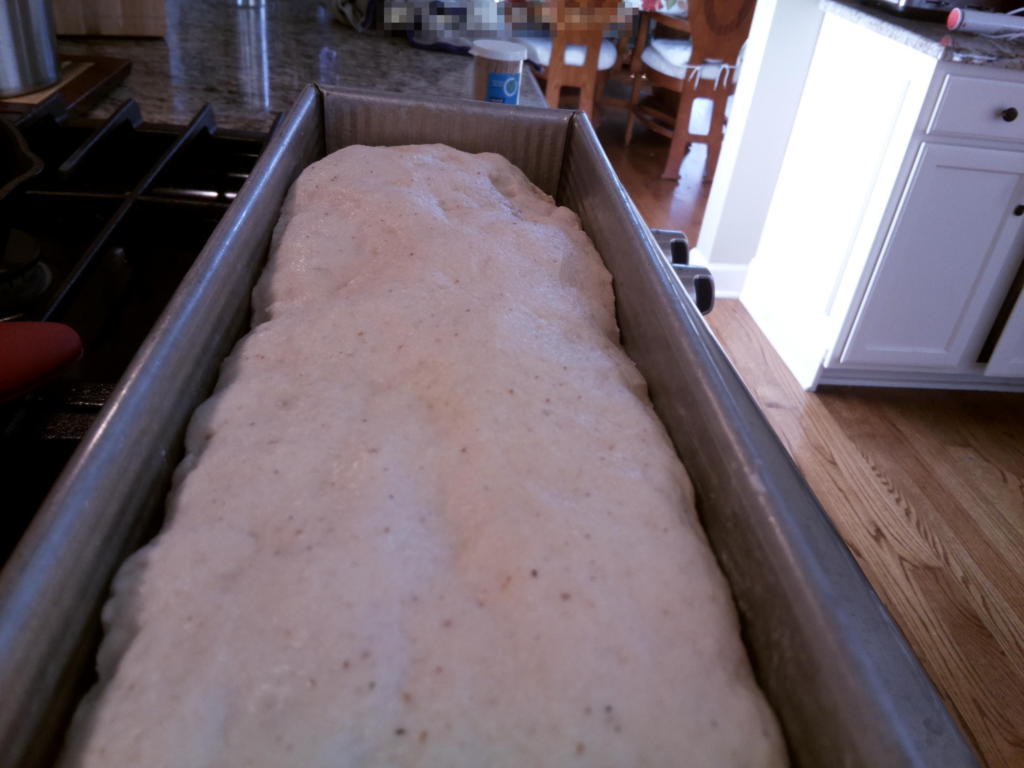
Even do a timelapse directly from the browser and download it from the cam.
You can now explore the camera and webcam settings. This URL is only available to you via the remoteit software and you can connect to it anywhere you have internet access.
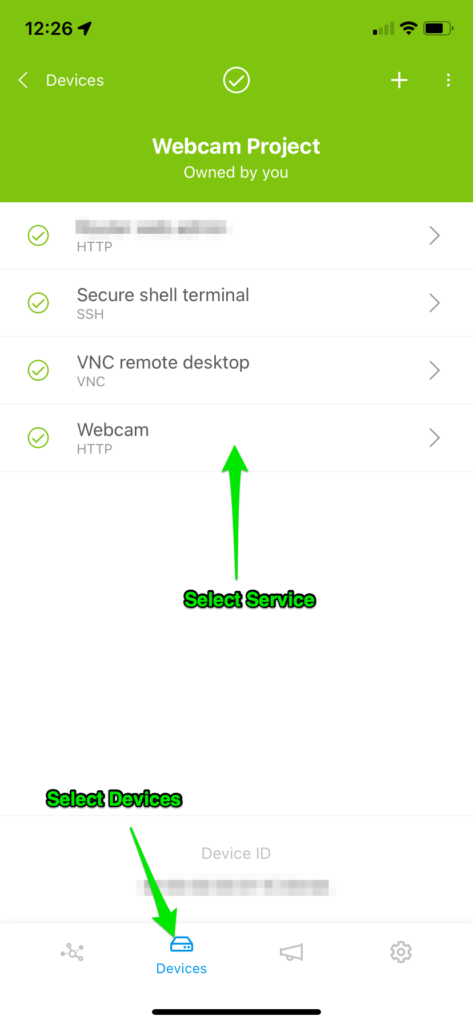
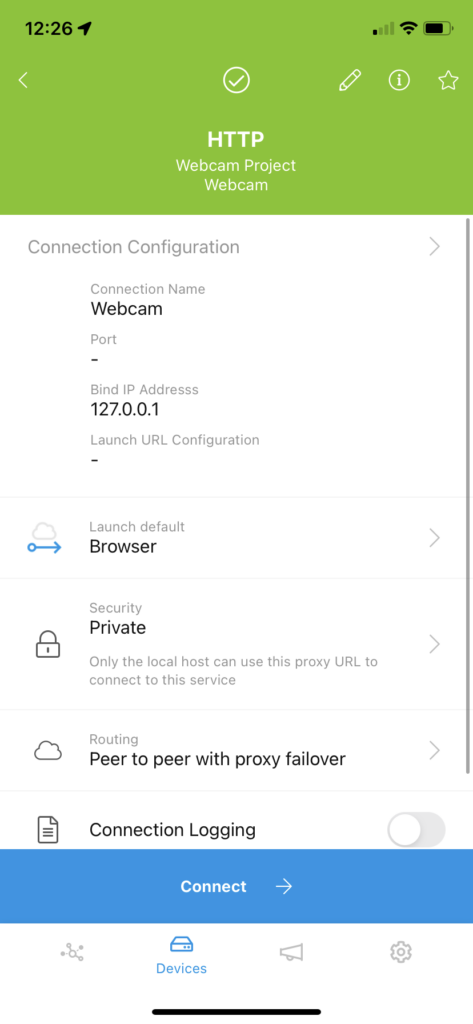
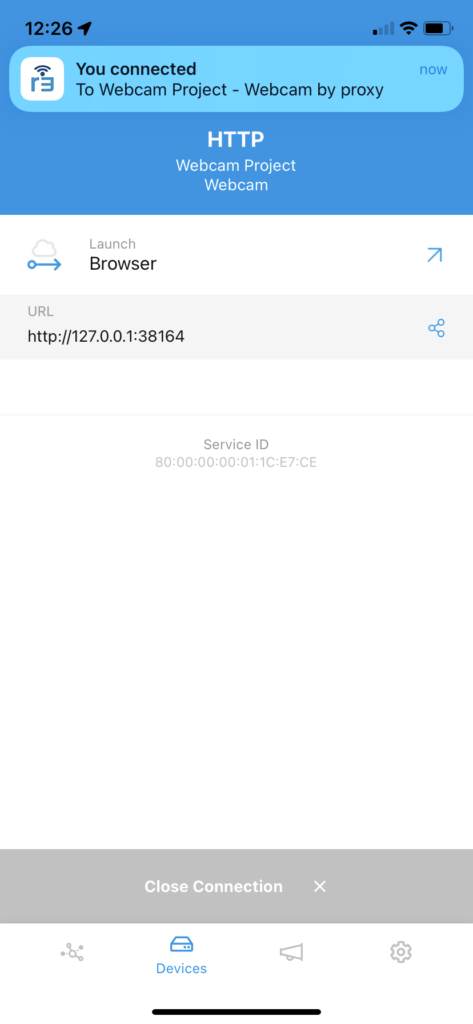
Connect via Remote.It mobile app
You can access it exactly the same from the mobile app and check my bread proof progress from down the street!
Take it Further
Use Remote.It for your SSH or HTTP connection from anywhere. If you connect to another network you’ll be unable to just do ssh pi@raspberrypi. With Remote.It installed you can take this example deeper with the included software – The camera software contains motion and light sensor libraries. Our Remote.It software allows you to securely connect to this device over any protocol, even do software development remotely on the Pi.
Read about Nasa and Secure Raspberry Pi